



Care & how-to
DIY Cat Shelves: How to Plan, Build and Mount Them Safely
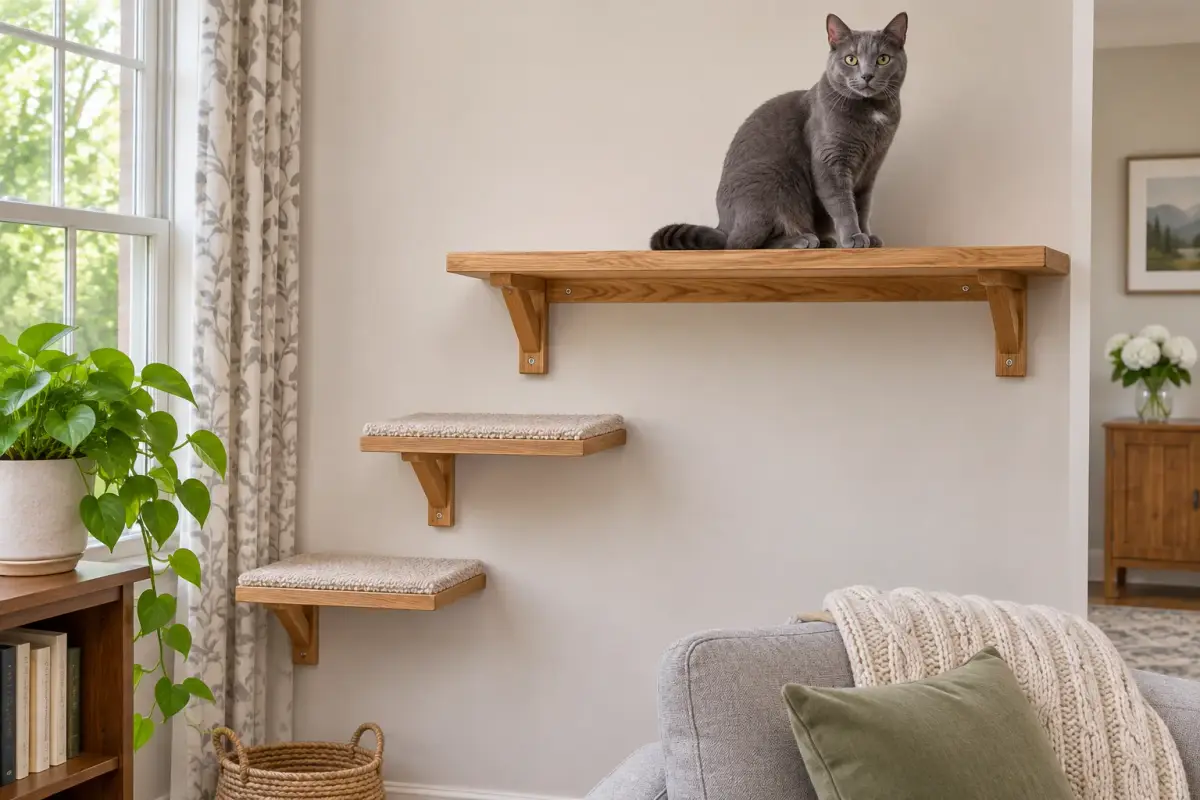
DIY cat shelves work when they are anchored into wall studs, strong enough for a cat landing from a jump, and arranged as a route your cat can climb and leave in two directions. Plan the route first, then build, mount and test. If you would rather not build, our cat wall shelves come ready to hang.
By Matt GarnettUpdated November 14, 20264 min read2 sources
Why build shelves for a cat
VCA Hospitals notes that cats often like vertical spaces for resting, playing and hiding, and names shelves, wall-mounted perches and tall cat trees as examples. It adds that because cats use both horizontal and vertical space, many do well in small homes. A line of shelves turns an empty wall into a lookout and a play route without using up floor space.
Building your own lets you match the shelves to your wall, your cat and your furniture. The trade-off is that you carry the full responsibility for strength. A shelf that fails under a jumping cat can injure it, so treat the mounting as the main job and the appearance as the extra.
Step 1: Plan the route
Start by watching where your cat already jumps: a bookcase, a windowsill, the back of the couch. VCA suggests that if a cat already jumps on something like a bookshelf, you can turn it into a perch by adding a bed on top. Build your route from that existing favorite spot upward, so the first step is somewhere your cat already goes.
Sketch the wall with each shelf in place. Space the steps so your cat can move between them comfortably, closer together for kittens, seniors or less agile cats, and make sure there are at least two ways down so one cat cannot trap another. Keep the route away from doorways, breakables and any desk or crib where a landing cat could cause an accident.
Step 2: Choose materials and tools
Use solid, sturdy lumber rather than thin particleboard, which can crumble around screws. Use metal brackets or heavy-duty shelf supports and wood screws or lag screws long enough to bite deep into the stud. Gather a stud finder, a level, a drill, a measuring tape and a pencil.
For the surface, plan a grippy cover such as carpet, sisal or a non-slip mat stapled or glued on, with rounded or sanded edges. Choose a finish or paint that is fully dry and low in smell, and let it cure before the cat is anywhere near. Avoid any trim that a cat could chew off and swallow.
Step 3: Find the studs and mount the brackets
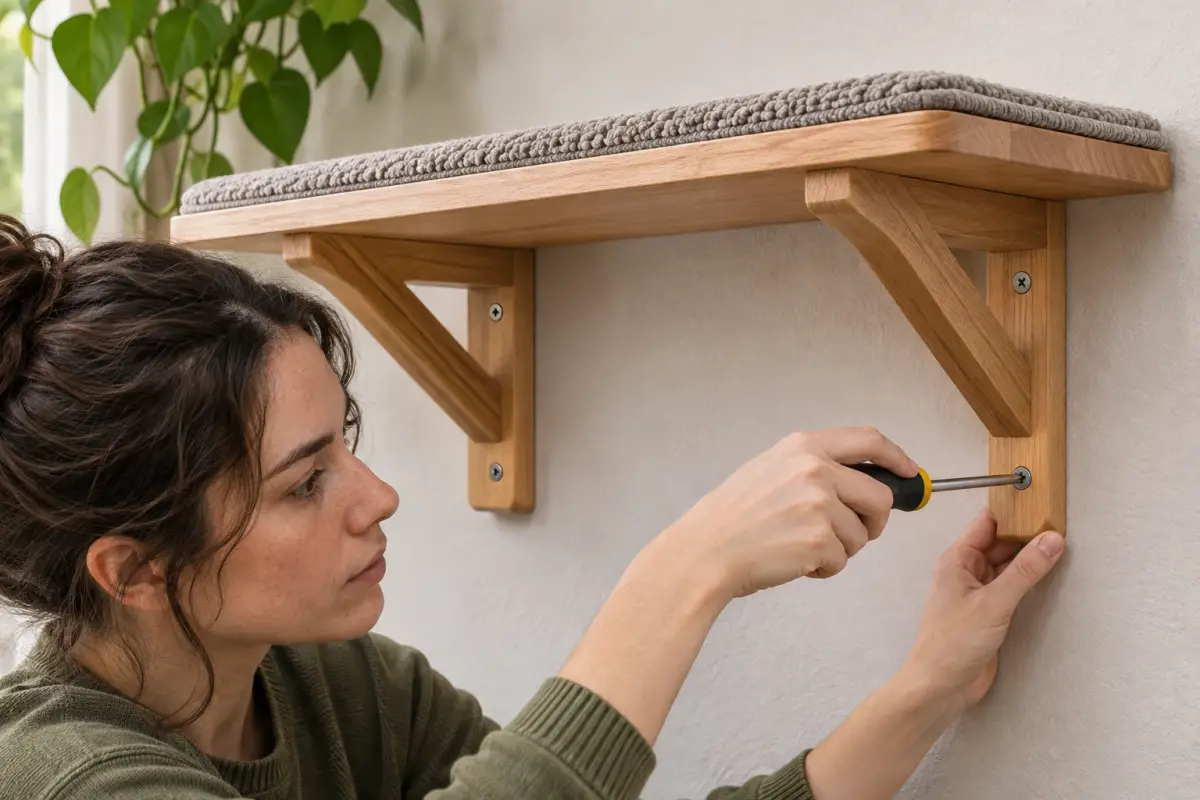
Use the stud finder to mark the studs and draw a vertical line on each. Fix the brackets into the studs wherever possible, using the level so every shelf sits flat. If a bracket cannot land on a stud, use wall anchors rated for far more than the load; a drywall-only fixing is not suitable for a jumping cat.
VCA Hospitals says to check each shelf's maximum weight limit, and to make sure a shelf can hold more than one cat's weight if you have several cats. A homemade shelf has no printed rating, so build in a generous margin and test it: lean your own weight on the outer edge before any cat uses it, and check that nothing flexes or creaks.
Step 4: Add the surface, steps and perch
Fit each board onto its brackets, secure it from below with screws and add the grip cover. Sand every edge smooth. At the top, add a flat, roomy perch, ideally with a view of the room or a window, and a small bed or folded blanket if your cat likes to curl up. A pre-made wall-mounted perch with a washable cushion can serve as the top spot if you would rather not build it.
If your wall layout is awkward, a ready-made cat shelf set or a wall-mounted jute climbing step can fill gaps in your own route, and a cat tree at the base gives an easy first jump.
Step 5: Test, introduce and maintain
Press hard on every shelf, then watch your cat's first attempts. VCA suggests hiding treats, catnip or toys up high to encourage climbing, so use those rather than lifting your cat up. If your cat hesitates, lower the first step or move the shelves closer together.
Check the screws and covers every few months, and replace worn carpet or sisal. Watch for changes: a cat that stops jumping or hesitates where it used to leap may be stiff or sore, and cats often hide pain, so mention it to your vet. Read our guide to choosing cat wall shelves if you decide to buy, and browse the cat wall shelves range.
This page is general information, not veterinary advice, and it cannot replace an examination by the vet who knows your pet.
Shelf project parts and their roles
| Part or tool | Role in the project | What needs separate verification |
|---|---|---|
| Lumber | Forms the resting surface | Actual material,dimensions and condition |
| Bracket or support | Transfers load to the wall | Compatibility with the wall and shelf |
| Screws or fasteners | Connect components and wall support | Correct fixing specification for the actual structure |
| Stud finder and level | Locate support and alignment | Wall construction and tool results |
| Surface covering | Provides the finished contact surface | Attachment and loose edges |
Common questions
How do I attach DIY cat shelves to the wall?
Screw metal brackets into wall studs found with a stud finder, using a level so each shelf sits flat. Use rated anchors only where a stud is not available, and test every shelf before your cat uses it.
How much weight should a DIY cat shelf hold?
VCA says to check each shelf's weight limit and to allow for more than one cat if you have several. A cat landing from a jump exerts more force than its resting weight, so build in a generous margin.
How do I get my cat to use new shelves?
Start the route at a spot your cat already likes, and hide treats, catnip or toys up high, as VCA suggests. Avoid lifting your cat onto a shelf, and give it a way down at both ends of the route.
Is it better to buy or build cat shelves?
Buying gives you a printed weight rating and tested hardware, while building lets you fit an awkward wall. If you are not confident with studs and fixings, buy ready-made shelves and mount them following the maker's instructions.
Sources we checked
This guide is general information, not veterinary advice. If your pet is unwell or injured, contact your veterinarian.


